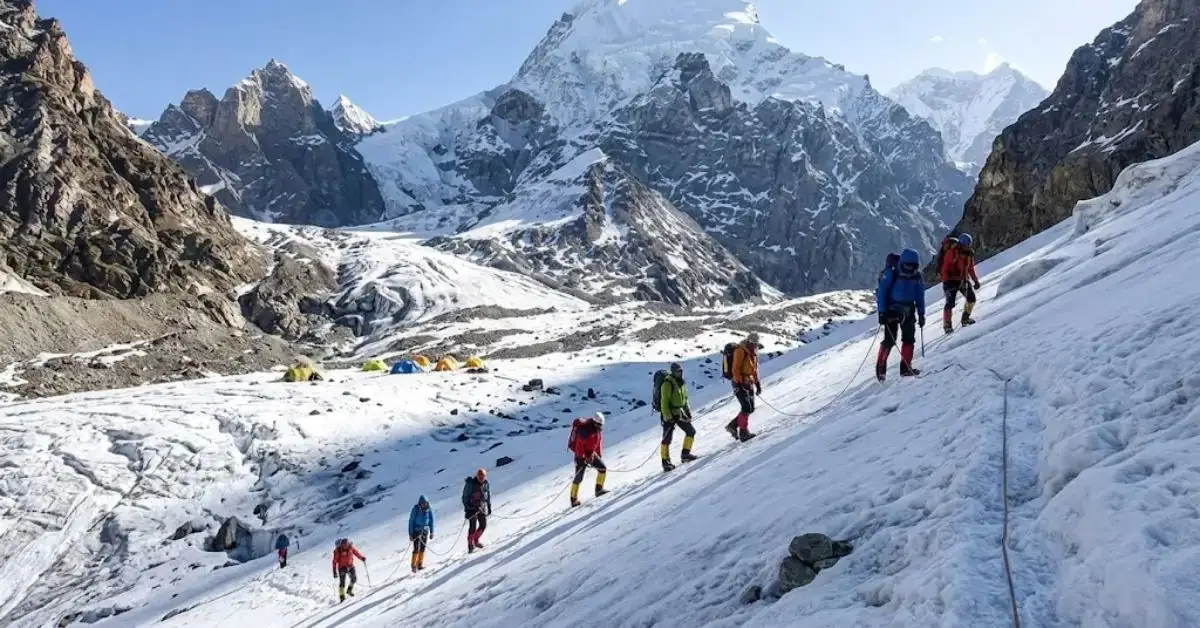
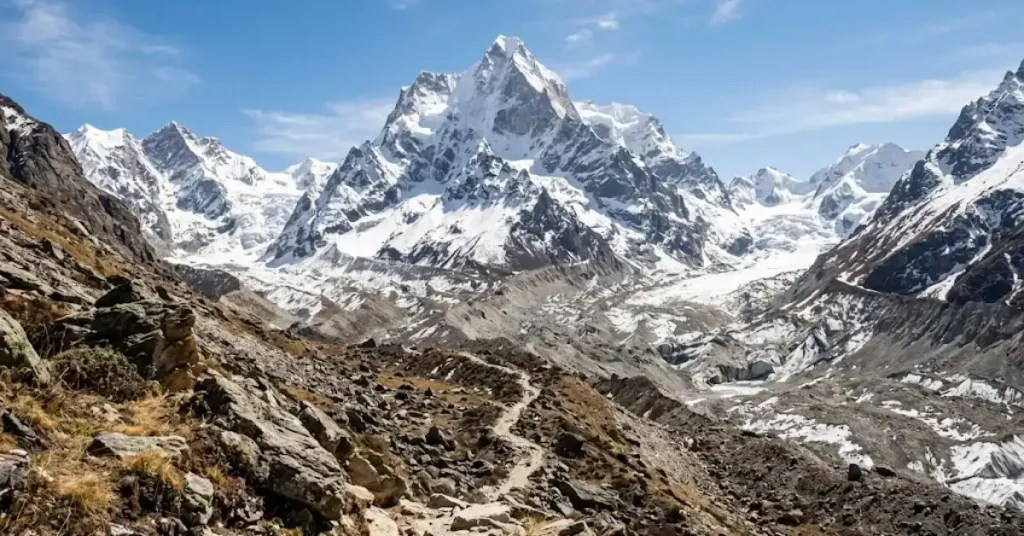
Most climbers who attempt Mt Satopanth return with one regret. The Mt. Satopanth is located at an elevation of 7,075 metres in the Garhwal Himalayas, Uttarakhand. The route starts within Gangotri National Park and continues along the glacial valley of Gaumukh, one of the most difficult high-altitude technical routes in the Indian Himalayas.
The upper mountain goes from mixed rock and ice terrain to a final snow ridge that punishes anyone who underestimated the weather. Your gear list is, in effect, your survival plan. Here is Mt. Satopanth expedition overview and a guide to help you pack your bag for climbing Mt Satopanth efficiently.
Mt. Satopanth Expedition Overview and the Route Description
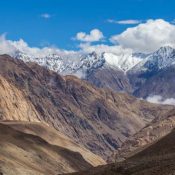
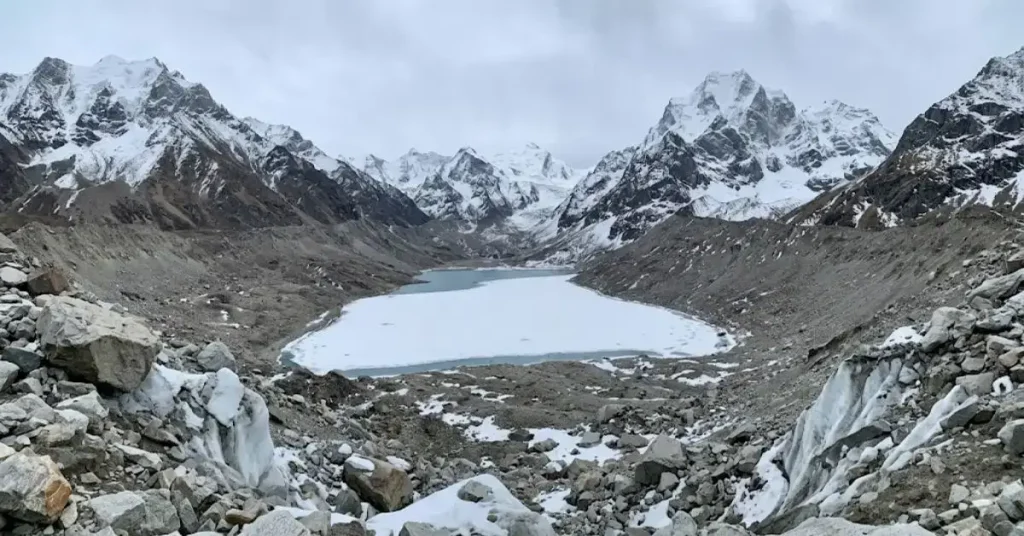
The expedition begins in Gangotri (one of four Char Dham pilgrimage towns) at an altitude of approximately 3,100 metres. It starts at that point and continues to the Gangotri National Park all the way to Gaumukh and follows with the Gangotri glacier route trek.
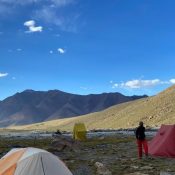
The Gaumukh and The glacier road to Base Camp at Vasuki Tal (around 4800m) involves navigating moraine, being aware of crevasses, and route finding, all of which are seasonal. Camp 1 is located at about 5,130 metres. Your summit camp (Camp 2) stands at about 5,800 metres.
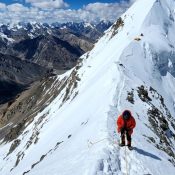
Satopanth route Knife Ridge is a route between Camp 2 and Summit. Lying bare on each side, it requires a sense of balance, controlled movement and favorable weather. The wind on the Knife Ridge finishes the top quicker than altitude will ever.
How Cold does Satopanth Actually Get?
The coldness of the satopanth temperatures cannot be fully predicted. The Gangotri valley guides the wind at night, and the west side of this mountain takes all the force of the weather system that passes through it.
Satopanth temperatures are the single most underestimated variable on this mountain. At nighttime, temperatures below zero occur at Base Camp (Vasuki Tal, 4800m), even in May. Camp 1 at 5,130m sees temperatures drop to -5°C to -10°C after dark. Your 5,800m, Camp 2, is in the range of -5 °C to -20 °C with or without clouds and wind. On the day of the summit, wind chill makes the felt temperature far lower than a thermometer shows.
The two possible seasons are the pre-monsoon (May to June) and post-monsoon (September to October) windows. Pre-monsoon provides more daylight and more snow on the glacier, which in fact aids crampon purchase. Post-monsoon is drier and colder, with more hard ice in the upper mountains. The two seasons need the same cold-weather equipment.
Read Also:- Kalindi Khal Expedition
The Complete Mt. Satopanth Expedition Packing List
Now, let us start to pack your bag one by one:-
1. High Altitude Technical Climbing Gear
Every piece here either supports your weight or protects you from falling. Nothing gets substituted.
- Waterproof mountaineering boots, double-layer construction (single boots won’t handle Camp 2 night temperatures).
- Crampons with anti-balling plates (mandatory on the Glacier’s wet spring snow).
- Ice axe, 60-70cm depending on your height.
- Climbing harness, sized for use over a down suit.
- Jumar ascender for fixed-line sections.
- Figure-8 descender.
- Locking carabiners, 3 to 4 screw-gate minimum.
- Two 1-metre slings.
- Climbing helmet.
The Satopanth route Knife Ridge section requires hands-free confidence with your ascender. Practice at home before the mountain demands it under pressure.
2. Clothing System
Layering for Satopanth temperatures means building a system rather than collecting individual pieces. Each layer has a job.
- Base layer:- Thermal tops and bottoms in moisture-wicking synthetic or merino wool. Two sets. Cotton at altitude holds sweat against your skin and chills you within minutes of stopping movement. Leave it at home.
- Trekking clothing (approach and Base Camp):– Dry-fit T-shirts and track pants for the walk-in from Gangotri. Cotton socks work here. Once you’re on the glacier, they don’t.
- Mid layer:- Fleece jacket, 200-weight or heavier. This goes on every time you stop moving above 5,000 metres.
- Insulation layer:- 800-fill down jacket paired with down pants, or a full one-piece down suit for summit push. The down suit simplifies layering above Camp 1 and reduces wind entry at the jacket-pants joins. Either option works. The fill power matters more than the brand name.
- Outer Layer:- Waterproof, windproof jacket with fully taped seams. Windcheater for the approach. Hard shell for anything above Camp 1.
- Head and Hands Protection:- Gloves or mittens rated to -20°C to -25°C with separate liner gloves underneath. The liners let you handle carabiners without removing the outer shell. Woolen cap that fits under your helmet. Sun cap for glacier travel during daylight. Buff or balaclava for summit day wind.
- Footwear accessories:- Merino wool socks for high-camp use and the summit push. Gaiters if your boots do not have built-in coverage above the ankle.
3. Sleeping System
Sleeping cold is the fastest route to a bad decision the next morning. Your sleeping system is not a place to cut weight.
- Sleeping bag rated to -20°C to -25°C (check the EN13537 lower-limit rating, not the comfort rating, which runs 8-10°C warmer).
- High-insulation sleeping mat with R-value of 6 or above (Therm-a-Rest NeoAir XTherm or equivalent; foam mats compress too much at altitude).
- Sleeping bag liner for an extra 5-8°C of warmth at summit camp.
- Plastic ground sheet for extra moisture barrier inside the tent.
One cold night at Camp 2 in a bag that’s not up to Satopanth temperatures will destroy your summit-day performance. This purchase earns itself on the first night.
4. Backpack
An 80 to 90-litre expedition rucksack for load carries between camps. If you are carrying your own loads, the fit and hip-belt padding matter as much as the volume.
5. Hydration and Nutrition
- Two 1-litre water bottles (wide-mouth plastic, not steel; steel chills your hands below -15°C).
- Electrolyte tablets, at least 40 for the full expedition.
- High-energy snacks for summit push: nuts, date bars, jaggery-based chikki, energy gels.
- Insulated bottle carrier for summit day so your water does not freeze solid before you need it.
Appetite drops sharply above 5,500 metres. Calorie-dense snacks that require no preparation are more useful than meals you don’t want to cook.
6. Lighting
- Headlamp rated for cold-weather battery operation, loaded with lithium cells (alkaline batteries fail below -10°C).
- Backup headlamp, same spec.
- Extra batteries for both.
Summit day starts at night 11 pm to 12 pm from Camp 2. Both headlamps need to work from the moment you leave the tent.
7. Personal medical kit
Carry your own kit regardless of what the team bag holds.
- Altitude medication as advised by your doctor before departure (Diamox is common; get a proper consultation, not forum advice).
- Basic medicines:- Ibuprofen, Paracetamol, Antihistamine.
- Blister care kit:- Leukotape, Moleskin, Antiseptic.
- Pulse oximeter (lightweight clip-type, under 50 grams).
Brief yourself on the symptoms of Acute Mountain Sickness, HAPE, and HACE before you leave Gangotri. Knowing what to look for in your teammates is as important as the medication itself.
8. Personal essentials
- Sunscreen SPF 50+, minimum 3 tubes (UV intensity at 7,075m damages unprotected skin in under 20 minutes).
- Category 4 UV/polarized sunglasses with side shields, plus a spare pair.
- Ski goggles for Knife Ridge conditions and summit day wind.
- Toilet roll and biodegradable waste bags.
- Basic hygiene kit.
Conclusion
The Mt. Satopanth Expedition packing list above is based on field experience, not a gear catalogue. Every item has a function. Some items are backups for the functions that matter most: warmth, communication, and safety. On a mountain this remote, two days from the nearest road-accessible hospital, the gap between “packed properly” and “did not quite bring that can result in a unique kind of trip home.
Kailasa Treks & Expeditions runs Garhwal Himalaya expedition guide with full logistics support, permit handling, and coordination of high-altitude porters. Check current expedition dates and availability at Kailasa Treks & Expeditions.
Helpful FAQs
A. The Knife Ridge after Camp 2. It is open on both sides, needs to be controlled to move, withstand the elements, and be sure-footed on technical terrain. No matter how poor the condition of teams is at Camp 2 or how inappropriate their footwear is, they very seldom come out of this part clean.
A. The two possible windows are pre-monsoon (May to June) and post-monsoon (September to October). There is more daylight during pre-monsoon. Post-monsoon offers drier weather and more ice on the top mountain. Both will need the same gear system for use at Satopanth, at the summit camp.
A. Yes. Personal climbing equipment including harness, crampons, ice axe, and helmet is provided subject to size availability and prior confirmation at the time of booking. Confirm your requirements early, particularly for boots and crampons where fit is critical.
A. Yes. Prior climbs above 6,000 metres or completion of both a Basic Mountaineering Course (BMC) and an Advanced Mountaineering Course (AMC) is the minimum requirement.
A. The expedition starts in Gangotri town, Uttarakhand. The route passes through Gangotri National Park to Gaumukh, then continues along the glacier path to the Vasuki Tal Base Camp at about 4,800 metres. Gangotri can be reached by road via Uttarkashi.
Also Go Through:-